 Save
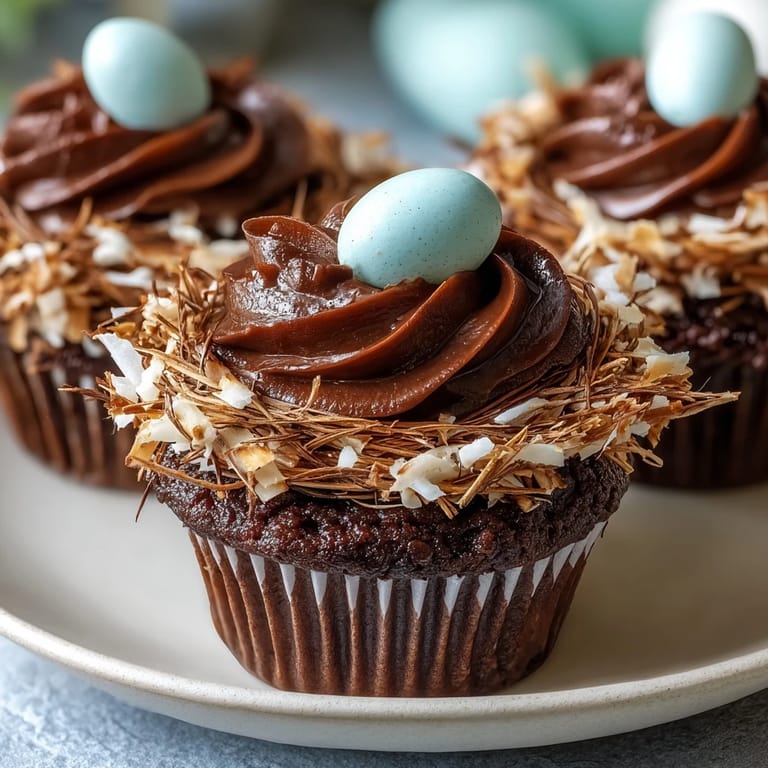
Save The first time I attempted these Easter Nest Cupcakes it was less about tradition and more about the irresistible idea of creating tiny edible nests bursting with colorful eggs. I remember the kitchen counter dotted with chocolate smudges and stray bits of coconut, the air thick with cocoa and the faint warmth of fresh cupcakes cooling by the window. Sometimes you cook just to celebrate a mood—or in this case the visual promise of spring after a long gray winter. The anticipation of biting into soft cake with a crunchy candy egg was enough to keep me humming while I worked. It turned out to be the playful project my fingers needed that afternoon.
Once, my niece joined me to help decorate, and she approached each cupcake as a unique nest, gently arranging the tiny eggs like a jeweler setting gems. Our focus wavered between serious artistry and giggling over who'd accidentally eaten the most candy. Ages vanished—just hands sticky with buttercream and hearts surprisingly full for a weekday afternoon. Those lopsided nests looked even sweeter on the table, each with its own slant and story attached. These cupcakes really pulled us all into the joy of the moment, no matter our age.
Ingredients
- All-purpose flour: Forms the sturdy but fluffy base for the cupcakes—for best results spoon and level for accurate measuring.
- Unsweetened cocoa powder: Rich chocolate flavor comes from a good-quality cocoa; sift out any lumps so the batter stays smooth.
- Granulated sugar: Sweetens the batter without turning it too heavy, and makes for tender crumb.
- Baking powder and baking soda: Pair up to give a gentle rise, keeping the cupcakes light—double-check freshness for reliable lift.
- Salt: Don't skip it! It deepens the chocolate flavor and balances the sweetness.
- Eggs: Room temperature eggs blend more easily into the batter for even baking.
- Whole milk: Lends moisture and richness; I like to let it sit out for 20 minutes before mixing in.
- Vegetable oil: Keeps the texture tender even after a day or two.
- Vanilla extract: A hint of vanilla smooths out the chocolate's bitterness—you'll smell it as you mix.
- Hot water: Essential for blooming the cocoa and helping the batter stay luxuriously moist.
- Unsalted butter: Softened butter whips up smooth and silky for a creamy chocolate buttercream.
- Powdered sugar: Gives the frosting structure; sift before adding for a lump-free result.
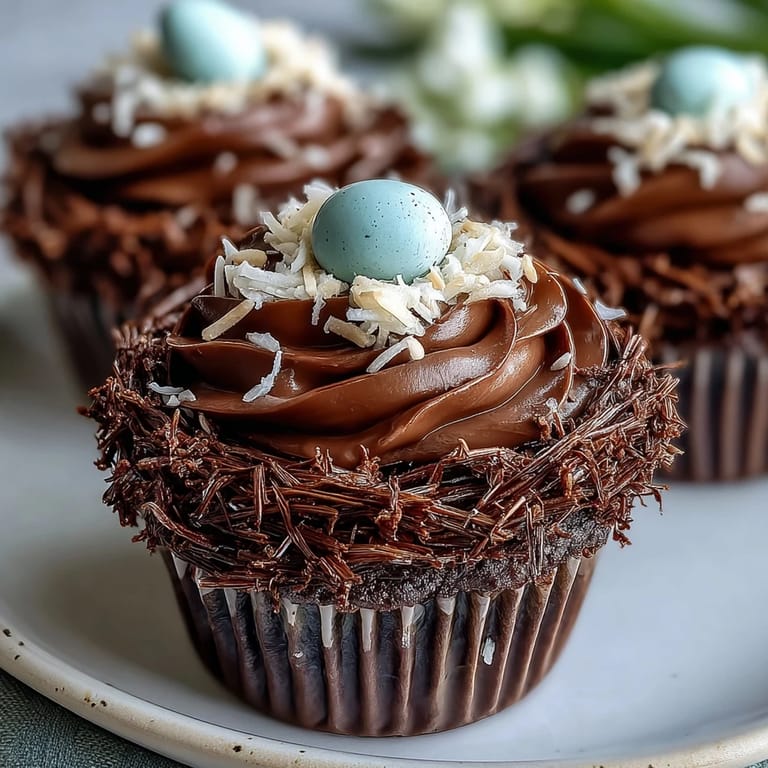
- Shredded coconut or chocolate sprinkles: Optional, but I love the way toasted coconut adds crunch and visual appeal to the nests.
- Mini candy-coated chocolate eggs: Turn each cupcake into a cheery celebration of spring—a must for the Easter theme.
Tired of Takeout? 🥡
Get 10 meals you can make faster than delivery arrives. Seriously.
One email. No spam. Unsubscribe anytime.
Instructions
- Prep and Preheat:
- Set your oven to 350°F (175°C) and line a muffin tin—nothing starts a bake like the warm hum and a neat row of papers ready for filling.
- Mix Dry Ingredients:
- In a big bowl, whisk flour, cocoa, sugar, baking powder, baking soda and salt until the cocoa's deep color is perfectly even—sounds like a soft sift as the mixture blends together.
- Combine Wet Ingredients:
- Beat eggs, milk, oil, and vanilla in another bowl; the mixture should look creamy and light, letting out that familiar vanilla scent as you stir.
- Make the Batter:
- Add the wet to the dry ingredients, mixing gently, and finally stir in hot water; the batter will feel surprisingly thin but will bake up rich and moist.—don’t worry if it seems runny.
- Fill the Liners:
- Pour or scoop batter evenly into liners, about 2/3 full—watch for drips and that glossy sheen on top.
- Bake:
- Slide the tin into the oven and bake 18–20 minutes, until a toothpick comes out clean and the tops spring back lightly—a chocolatey aroma fills the kitchen as they bake.
- Cool Down:
- Let cupcakes sit in the tin a few minutes, then transfer to a wire rack; they’ll finish setting as they cool, making them easy to frost.
- Make the Buttercream:
- Beat softened butter with powdered sugar, cocoa, milk, vanilla, and a pinch of salt, watching it turn light and fluffy with each pass of the mixer.
- Decorate the Nests:
- Pipe or spread the chocolate buttercream in circles for a nest shape; don’t worry about perfection—texture is your friend here.
- Add the Eggs:
- Sprinkle with coconut or sprinkles if you like, then tuck 2–3 candy eggs into the center of each nest and resist eating them right away.
 Save
Save The year I brought these cupcakes to our family Easter brunch, even my typically reserved uncle claimed an extra “for the drive home”—by the time we cleared the dishes, every nest had been picked clean of its candy eggs. That's when I realized these treats weren't just showy—they created the kind of joy and laughter you hope every dessert will bring.
Decorating Mini Nests with Kids (or Adults)
Handing over the piping bag or even just a butterknife can spark creativity and conversation—everyone has their own idea of the perfect nest. I’ve found letting go of symmetry invites more fun, and the best part is watching the pride in each person’s finished creation.
Storing and Serving Suggestions
After decorating, these cupcakes stay fresh covered at room temperature for up to two days, and they’re even delicious slightly chilled. Serving them on a bright platter or cake stand turns them into an eye-catching centerpiece for your table.
Troubleshooting Sticky Buttercream and Other Surprises
If your buttercream is a bit too soft, stick it in the fridge for a few minutes before piping, then try again—the swirls will hold beautifully. If you’re short on time, spreading with a spatula still gives that nest effect—no special tools needed.
- Use a gentle hand when adding candy eggs to avoid sinking them into the frosting.
- If you run out of coconut, chocolate shavings fill in as nest topping just fine.
- Remember, imperfect nests taste just as sweet!
 Save
Save Sometimes, the simplest joys come dusted with cocoa and candy shells. May these cupcakes bring as much fun to your home as they've always brought to mine.
Recipe Q&A
- → How can I tell when the cupcakes are done?
Bake 18–20 minutes at 350°F. Insert a toothpick in the center — it should come out with a few moist crumbs but no raw batter. Tops will spring back slightly when touched.
- → Why is the batter thin and is that normal?
The hot water thins the batter to help bloom the cocoa and produce a moist crumb; a runnier batter is expected. Pour gently into liners and avoid overmixing to keep texture tender.
- → How do I create the nest shape with buttercream?
Pipe or spread the buttercream in a circular motion, starting from the outside and spiraling inward. Use a small spoon or piping tip to press a shallow well in the center for the eggs, then add coconut or sprinkles for strands.
- → Can I toast the coconut and how long?
Yes — spread shredded coconut on a baking sheet and toast at 325°F for 5–7 minutes, stirring once, until lightly golden. Watch closely; coconut browns quickly and adds a nutty flavor and better nest texture.
- → What are good make-ahead or storage options?
Store cooled, unfrosted cupcakes in an airtight container at room temperature for 1–2 days, or freeze cooled cupcakes for up to 2 months. Frosted cupcakes keep 1–2 days refrigerated; bring to room temperature before serving.
- → How can I adapt for allergies or dietary needs?
Use gluten-free flour blend in a 1:1 swap if needed, and choose dairy-free butter and milk alternatives for the buttercream. Check candy egg labels for allergens or use allergen-free chocolate alternatives.